


Disclosure: This article contains affiliate links. If you sign up for Cloudways through them, GTStudios may earn a commission at no extra cost to you.
Table of Contents
Building a website yourself has never been easier — but hosting is where a lot of DIYers get stuck. Cheap shared hosting is slow and cramped, while a raw cloud server means learning Linux, Nginx, firewalls, and backups. Managed cloud hosting is the happy medium, and Cloudways is the tool that makes it approachable. Here is how to do it yourself, step by step.
Why managed cloud beats shared hosting
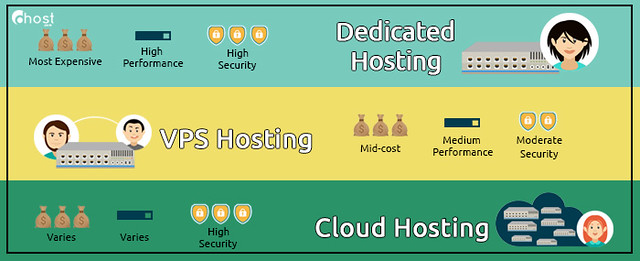
Shared hosting packs hundreds of sites onto one machine. When your neighbor’s site gets a traffic spike, your site slows down. Managed cloud gives you dedicated resources on premium providers — DigitalOcean, Vultr, Linode, AWS, or Google Cloud — with the server administration handled for you. You get real speed without becoming a system administrator.
The DIY win: you own the hosting account, you control the costs, and you keep full flexibility. Start a free trial — no credit card needed.
Step 1: Create your Cloudways account
Sign up for a free Cloudways trial. You will not need a credit card to launch your first server, so you can follow along risk-free.
Step 2: Launch a server and pick your platform
From the dashboard, click Launch. You will choose three things:
1. Your application — WordPress, WooCommerce, Laravel, Magento, Drupal, or a plain PHP stack 2. Your cloud provider — DigitalOcean is the best starting point for most people (fast and affordable) 3. Server size — start small; you can scale up with a slider any time
A few minutes later your server is live, with the platform already installed. No SSH, no config files.
Step 3: Point your domain
Add your domain in the dashboard, then update the DNS records at your registrar to point to your new server’s IP. Cloudways provides free SSL certificates with a single click, so your site loads securely over HTTPS.
Step 4: Build and go live
Log into your platform — for example the WordPress admin — and build your site. Cloudways handles the parts that usually trip people up:
- Caching for speed (built-in Breeze, Redis, and Varnish)
- Automated backups so you can restore in one click
- Staging environments to test changes safely
- 24/7 support if you get stuck
What it costs
Managed cloud hosting starts around the price of a couple of coffees a month and scales with your needs — a lot more power than shared hosting for a comparable price, without the server headaches. Because you pay as you go, there are no big annual lock-ins.
Rather skip the DIY part?
Doing it yourself with Cloudways is genuinely straightforward, and we recommend it for anyone who likes being hands-on. But if you would rather hand the whole thing off, GTStudios builds and manages sites for you — same premium cloud, zero dashboards on your end. Launch it yourself with the guide above, or let us do it for you.
Featured image — Photo: Deb Haaland / Public domain, via Wikimedia Commons
Frequently Asked Questions
Do I need coding skills to host a site on Cloudways?
No. Cloudways installs your platform for you and manages the server, so for WordPress or WooCommerce you never touch code or the command line. If you can use a normal web dashboard, you can launch a site.
Which cloud provider should I choose on Cloudways?
DigitalOcean is the best default for most DIY users — it is fast, affordable, and reliable. You can always scale up the server size or migrate to another provider like Vultr or AWS as your site grows.
Is there a free trial?
Yes. Cloudways offers a free trial with no credit card required, so you can launch a server and test your site before paying anything.
Can I move my existing website to Cloudways?
Yes. Cloudways offers a free migration plugin for WordPress and a migration service for other platforms, so you can move an existing site over without downtime.